Designing Mini Books with InDesign
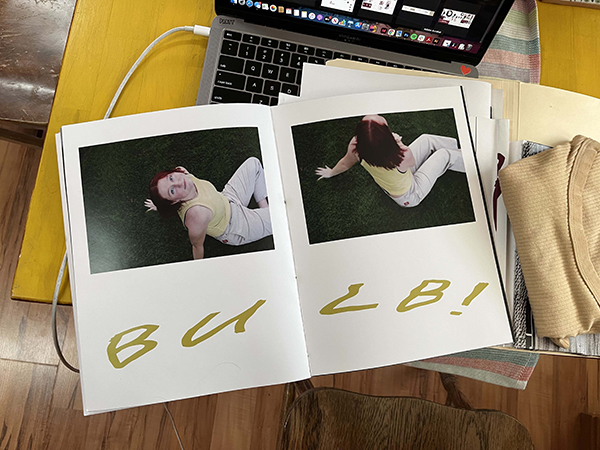
Have you ever wanted to make a booklet or zine and not known where to start? It can be very intimidating to start, but can actually end up being a very simple process when using Adobe InDesign! In this article I’ll explain to you the process and some tips to start you out.
1. Open InDesign and select New File.

2. Choose paper size. The first choice you’ll have to make is the page size. Take into consideration what
you’ll be printing on. If you’re wanting to use normal letter-sized printer paper,
choose the “half- letter” option. If you’re wanting to use 11 x 17 tabloid paper,
choose the “letter” option. This is because when you print, you’ll be printing two
pages of your booklet on each side of paper, so you can fold it. So your page size
must be half of the paper size you’re planning to use.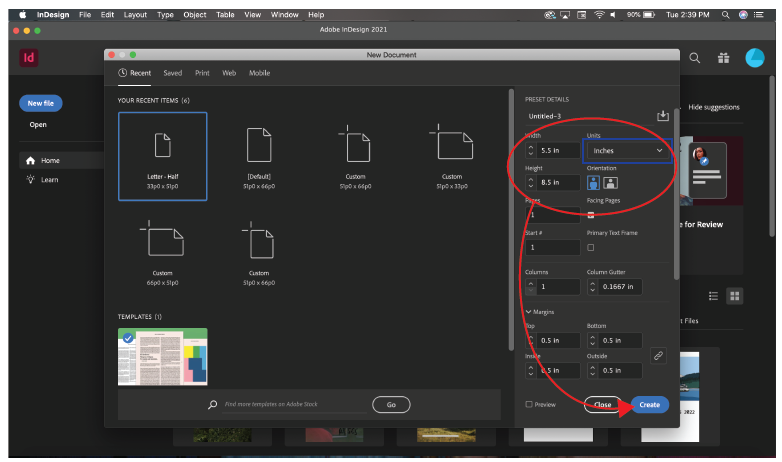
Tip: I prefer to use inches over pixels, so I changed that on the side, to the right of the page dimensions.
For this example I'll be using a half-letter size page, so I can print on letter-size paper. Hit Create!
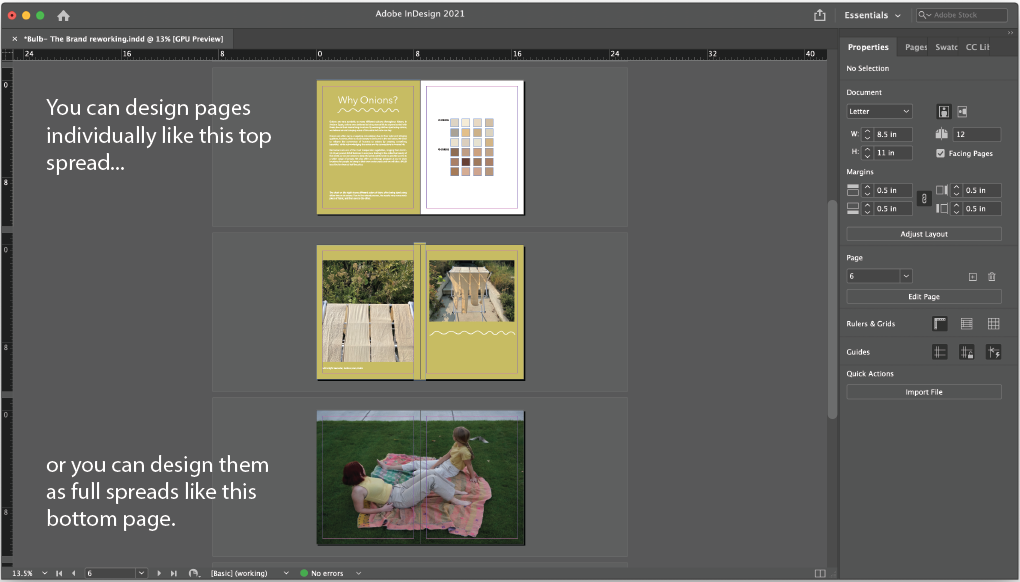
This is the page that pops up (below). In the sidebar, you can add pages, edit the page size, change the margins, etc.
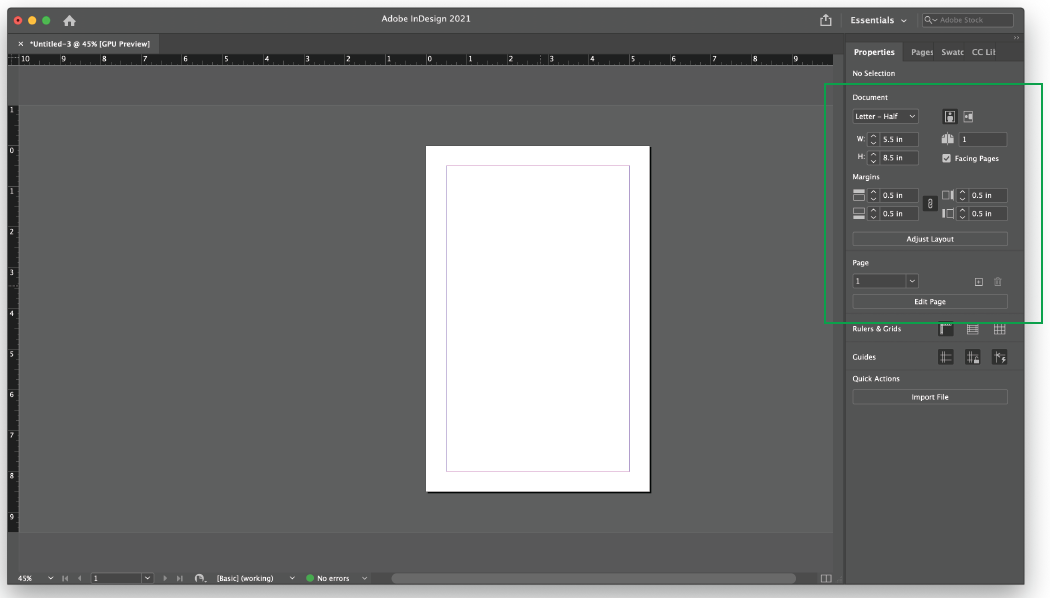
TIPS:
- When adding pages, make sure the total page count is a multiple of 4. This will be necessary for it to print correctly.
- When creating a booklet, make sure to check the “Facing Pages” box so it shows up in a booklet spread format.
3. Add text and images.
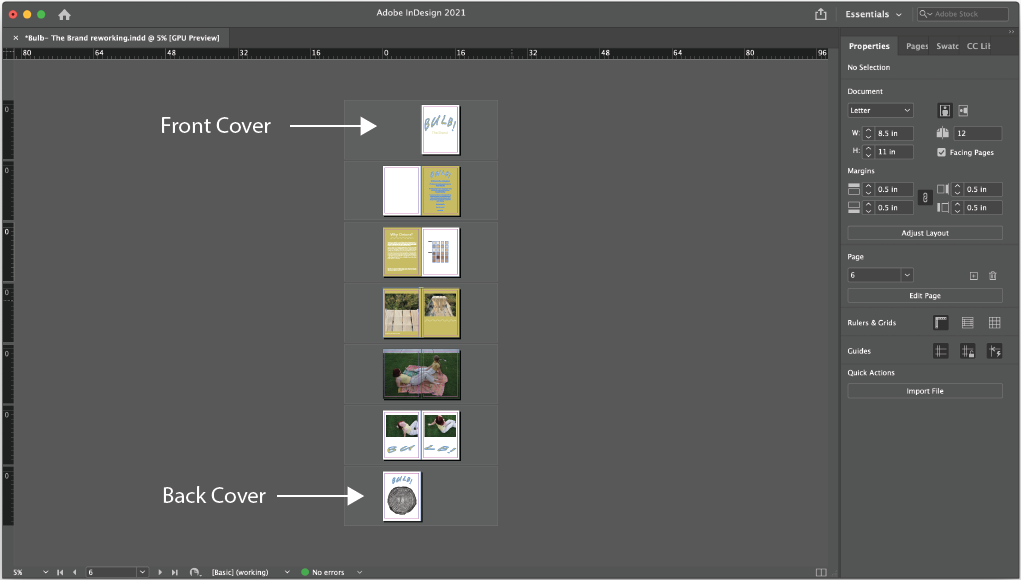
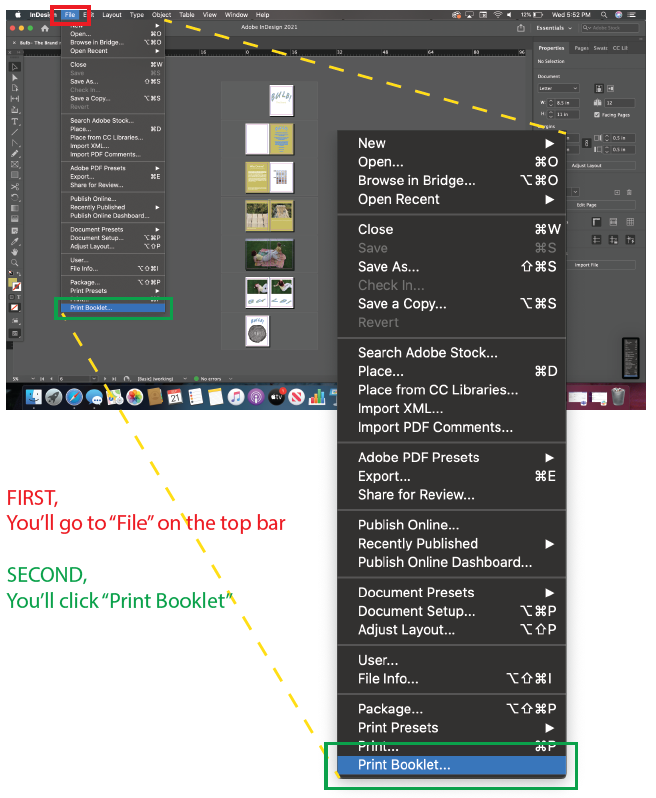
4. Print booklet. Once you are finished making your booklet, it's time to print! This part may seem intimidating, but it's actually a lot less scary than it looks.
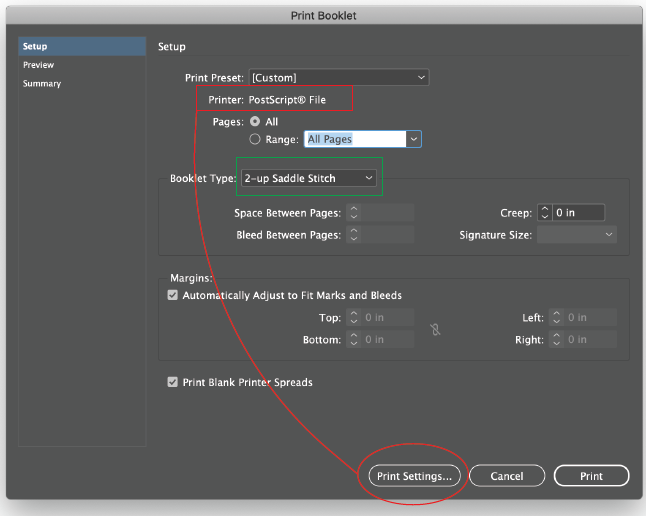
Here my printer is selected as a PostScript File, which will save it in booklet format to your computer. If you want to change this to a printer, click Print Settings.
You can also change the Booklet Type, which will affect the arrangement of the pages. I always us the "2-up Saddle Stitch" type. With this type, the front cover will be printed next to the back cover, and it'll continue to print from the outside in.
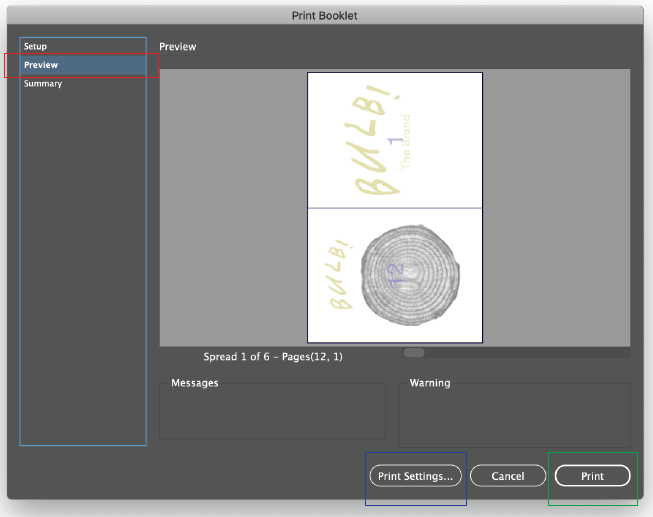
In the Preview button on the side, you can make sure your layout looks correct. If your setup page looks like this and has no warning icons, you are good to continue.
If you have "PostScript File" selected as your printer, click Print. If you want to print it directly from your computer, continue by clicking Print Settings.

Click Printer and adjust layout settings.
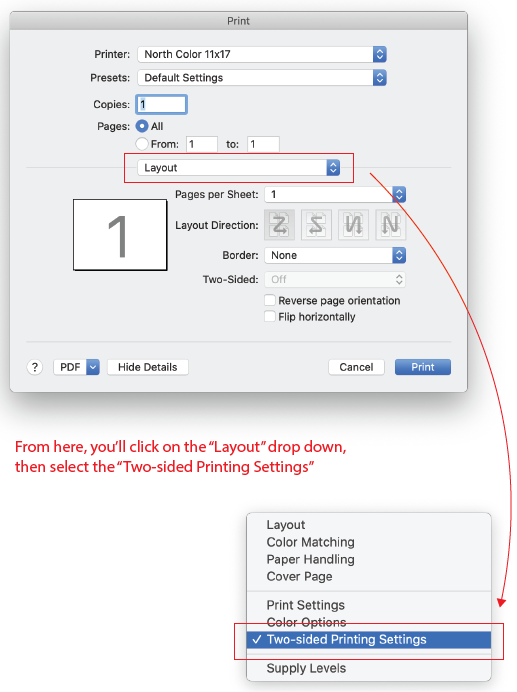


Click Print.
5. Compile the pages, fold, and bind.
You can use a saddle stapler or stitch the pages together by hand. Here's an example of my booklet after I printed it out and stitched it together.

Congratulations on your first booklet!
